每次我回台灣, 蘿蔔糕一定是必點的早餐. 我就是愛那個酥酥的口感. 沾著醬油吃就很滿足. 再來一杯大大的熱豆漿, 整個幸福感全部都出來了啦! 可惜, 在我這裡吃不到! 非常慶幸的是, 我仰慕的料理女神琳達姊他做了純米蘿蔔糕. 馬上! 看了食譜, 衝去亞洲市場買材料, 回家做啊! 過程非常的簡單, 而且材料更簡單! 吃的安心也吃的開心啦!

材料 Ingredients:
在來米 400g Extra long grain enriched white rice 400g
水 400ml + 100ml Water 400ml + 100ml
白蘿蔔淨重 900g Daikon net weight 900g
鹽巴 1.5 小匙 Salt 1.5 teaspoon
白胡椒粉 1.5 小匙 White ground pepper 1.5 teaspoon
糖 1 小匙 Granulated sugar 1 teaspoon
油蔥酥 2-3 大匙 Dry shallot flakes 2-3 tablespoons
***如果你在美國如果沒有在來米的話, 可以去美國的一般超市, 上面就是寫 extra long grain enriched white rice***
網路抓圖, 這是其中一款

先把在來米泡在 400ml 的水, 泡過夜.
Soak the extra long grain white rice in 400ml water over night

泡好以後, 變成這樣子, 會比較容易碎就可以打成漿.
After soaking, it looks like this, it is easy to break apart and will be easier to liquify.

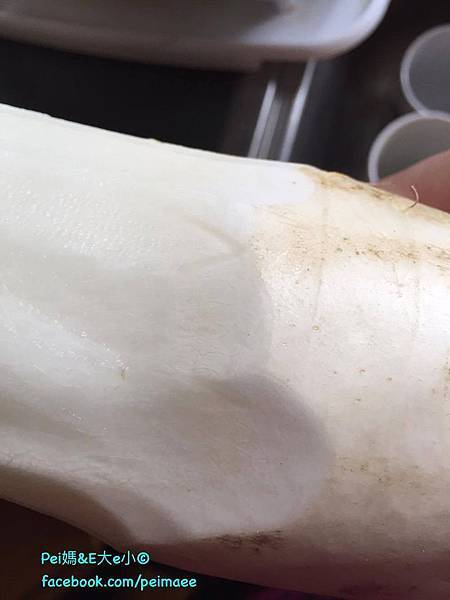
先把白蘿蔔削皮完以後再秤重. 記得白蘿蔔要買大條一點的, 因為白蘿蔔的皮要削掉好幾層才夠喔, 不然煮出來的蘿蔔糕會很苦 (親身經驗的失敗例子, 看照片可以清楚看到層次)
Remember to peel the daikon first before you weigh it. In addition, don't be afraid to buy a huge daikon because you need to peel the skin off several layers, or else the end product will be very bitter (personal experience. You can see the layers in the picture below)
***同一個地方削個 4-5 次就可以看到純白的肉了***
***Peel the same place 4-5 times then you can see the white part***

用食物絞碎機弄成絲
Use the food processor to shred the daikon

媽媽廚房的好幫手

不用放任何的油, 先把蘿蔔絲放進去平底鍋. 然後放入調味料
Without any oil, cook the shredded daikon first with seasonings

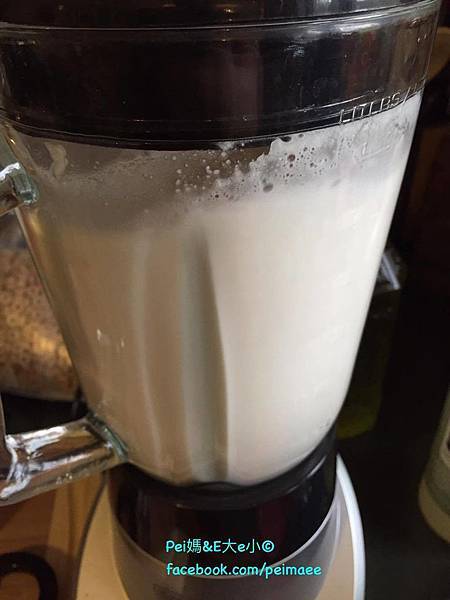
等攪拌均勻以後, 就先關小火. 用果汁機, 加入 100ml 的水, 再把泡好的米連帶水一起放進去果汁機打成漿
After it's stirred well, turn down the heat. Use a blender, add in 100ml of water, and then add in the soaked rice (water included) into the blender and liquify.

把打好的米漿加入蘿蔔絲裡面
Add the liquified rice into the shredded diakon

開始用小火慢慢的煮到濃稠
Using low heat and cook until the mixture is thicken

記得要一直攪拌, 免得燒焦
Remember to stir constantly to avoid burning

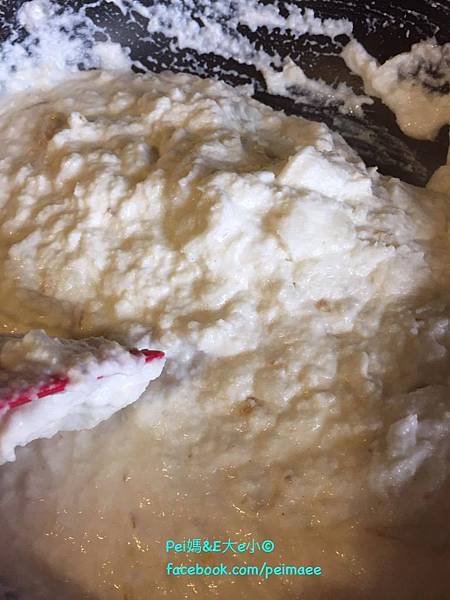
差不多這個濃稠度以後就可以起鍋了
Wait until about this consistency in the picture, and you can transfer it into another pot

用一個玻璃容器或者是大同電鍋內鍋比較不會沾黏.
This daikon cake won't stick if you use a glassware or the pot from inside Ta-Tung electric stove

再裝的時候要稍微壓一下, 讓他密合一點
Remember to press down the cake with a spatula to let it bind together

外鍋放 700ml 的水, 跳起來以後在悶個 30 分鐘, 只要不沾黏或者是超微一點點沾黏即可.
Put 700ml of water on the outside of the pot using the Ta-Tung electric stove. Steam another 30 minutes once it's done steaming. As long as it doesn't stick or stick a little then the cake is done

放冰箱過夜, 再拿出來切割. 先用小刀子刮過邊緣, 如果沾黏掉不出來的話, 可以用軟矽膠的抹刀幫忙分開底部
Put it in the fridge overnight. The next day, you can use a small knife to go around the edges. If the bottom is too sticky, you can use a spatula to separate the bottom

要吃的時候在煎到酥脆就可以了!
Pan fried it until crispy then you are done!

沾醬 Dipping sauce:
醬油膏 2 大匙 Soy sauce paste 2 tablespoons
糖 1 大匙 Sugar 1 tablespoon
熱水 1 大匙 Hot water 1 tablespoon
大蒜 適量 Chopped garlic appropriate amount
***鹹甜自己調適喔***
***Adjust the taste according to your liking***

如果口感要軟一點, 在打米漿的時候水分可以多加一點
If you wanted the cake to be softer, you can add more water when you are blending the rice
Pei媽最喜歡吃這個當早餐了, 希望你們也會喜歡喔!!!
Pei媽&E大e小 Copyright © 2016
來我的粉絲頁逛逛吧! 有更多的生活點滴分享喔!


 留言列表
留言列表
